|
E30/E36/E46 Lower Control Arm Bushing Replacement
The lower control arm bushings stabilize the rear of the front lower control arms. After about 50k miles the stock non-M3 bushings can begin to tear. When they do, the rear of the control arm is allowed to move farther than it should causing instability and a shake in the steering wheel when braking at high speeds (over 50mph).
Of course why just replace when you can also... UPGRADE! 318 and 32X models came from the factory with rather weak bushings. The '96+ M3 bushings are much stronger, making the handling more precise and should last much longer. '95 M3 bushings are supposedly even stronger, but offset the position of the control arm for additional caster. Realignment will definitely be necessary if upgrading to '95 M3 bushings, but should not be needed if using non-M3 or '96+ M3 bushings.
The car shown in this write up is a '97 318ti, but all E30, E36 and E46 models should be pretty much identical. All share the same basic front suspension design.
You will need the following parts:
- Jack
- Ramps/jackstands
- 17mm socket
- Air Impact or 1/2" Drive Ratchet
- Hammer and Chisel
- Gear Puller
- Harmonic Balancer Puller
- 6" Long - 3/8"ID (1/2"OD) Square Steel Pipe
- 2x 5/16" All-Thread - 12" Long
- 4x 5/16" Nuts
- 4x 5/16" Fender Washers
- Air Body Saw or Sawzall
- Large Socket ~1-1/4"
- Large Bench Vice
- 5/8" Socket
- 3/8" Drive Ratchet
- 31 12 9 059 288 - E36 Non-M3 Bushings
- 31 12 9 069 035 - E36 '96+ M3 Bushings (optional for non-M3)
- 31 12 9 064 875 - E36 '95 M3 Offset Bushings (optional for non-M3)
- 31 12 9 058 931 - E30 Non-M3 Bushings
- 31 12 9 061 222 - E30 M3 Offset Bushings
- 31 12 6 754 547 - E46 Non-M3 Bushings
- 31 12 2 229 857 - E46 M3 Bushings
Jack up the front of your car and support it with jackstands. Refer to the "how to jack up your car" article if you're not sure how to do so. If you want to live, do not work under your car without using jackstands!
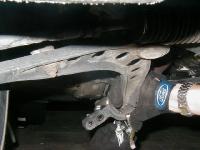
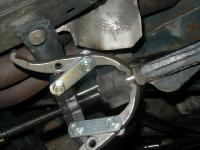
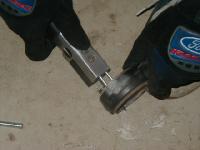
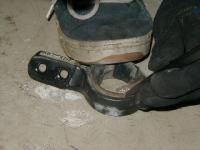
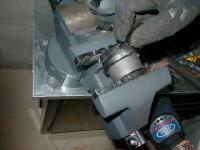
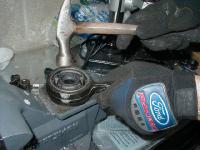
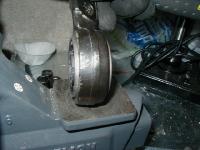
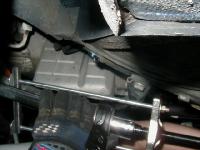
Use a 17mm socket to remove the bolts securing the control arm bushing brackets to the frame. Use a gear puller to separate the bushing/bracket from the end of the control arm. It's likely that the outer part of the bushing will tear away from the inner. If it does, use the gear puller again to remove the inner part of the bushing from the control arm.
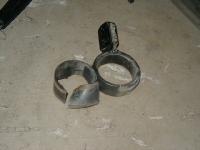
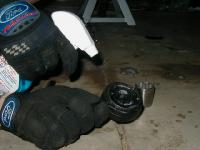
Use an air body saw to cut through the outer ring of the bushing in two places, be careful to not cut in to the bracket... much. Use a hammer and chisel to collapse the outer ring and knock it out of the bracket. Admire your cuts in to the bracket, then get over it, doesn't really hurt anything... unless you cut all the way through the bracket!
Align your new bushing in the bracket so the raised dot on the side of the bracket lines up with the arrow on non-M3 bushings or a similar raised dot on M3 bushings. Use a large bench vice or a hydraulic press to press the new bushing in to the bracket as far as possible. Then use a hammer to "fine tune" the position of the bushing in the bracket. The bushing should be centered in the bracket with even amounts sticking out of both sides.
Get the other bushing ready too. You'll need to install both sides quickly, once you install the new bushing on the control arm, you need to get the car back on the ground in ~30 minutes for the bushings to set up properly.
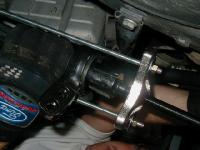
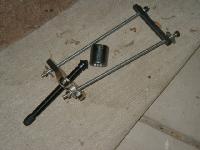
To whip up a handy tool to install the new bushing/brackets on to the control arms, drill holes in the end of the 3/8" steel pipe that match up with the widest slots on the harmonic balancer puller. The all-thread passes though the holes, washers and nuts secures the all-thread. Assemble the pipe/all-thread/puller on the control arm. The pipe fits though the rear most hole in the control arm, the all-thread pieces bolt though the pipe, the puller slips over the all-thread, washers and nuts hold that mess together. A large socket (1-1/4") makes a great adapter to allow the center bolt of the balancer puller to push the bushing on to the end of the control arm.
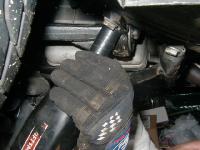
Spray window cleaner or soapy water on the inside of the bushing. Use your new, uhh, tool to press the bushing on to the end of the control arm all the way. It is possible to just PUSH the bushing on to the control arm with your bare hands, I've done it before, but it's not at all fun while under the car with nowhere to leverage yourself... you basically just push yourself around on your back. That's why I made a tool this time!
Twist the bracket on the control arm so that the bolt holes line up with the threaded part of the frame. Finger tighten the bolts attaching the brackets to the frame, then tighten them fully with a quick air impact blast. Now finish up the other side quickly, remember 30 minutes, tick tock!
Lower your car back down off the jackstands. Push down on the front of the car a few times so that it's sitting at normal ride height. Do not drive the car for several hours so that the bushing fully stick to the control arms.
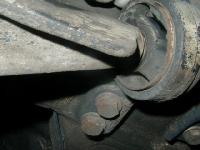
Old Bushing |
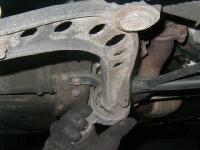
Bolts Out |
Gear Puller |
Inner Bushing |
Cut Outer Ring |
Chisel Ring Out |
Old Bushing Removed |
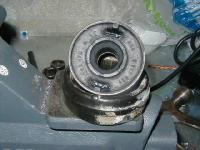
Alignment Marks |
Pressing New Bushing |
Centering Bushing |
Centered In Bracket |
Lube Bushing |
Bushing Install |
Assembled Tool |
Tighten Bolts |
Install Tool |
|
|

|