|
X-Brace Install
The "x-brace" is a cross reinforment brace that helps to connect the front crossmember to the front subframe rails. It is stock on all E36 convertibles (including Z3's) and the '95 M3 LTW. Although it was not stock on the E36 coupe, sedans and compacts it does improve chassis rigidity and handling if added.
You will need the following parts/tools:
- Floor Jack
- Ramps/jackstands
- 3/8" drive rachet
- 3/8" drive torque wrench
- 13mm socket
- 16mm Socket
- 13mm wrench
- 6mm allen wrench/key
- Lock-Tite Medium Strength (Blue)
- Lock-Tite High Strength (Red)
- BMW X-Brace #51 71 8 410 212
- 4x BMW M8X20-Z1 Hex Bolt with Washer #07 11 9 915 093
- 4x BMW M8 Blind Rivet Nut (nutsert) #51 71 8 175 003
- Lowes/HQ M8X30 Allen Bolt(s)
- Lowes/HQ M8 Washers (at least 2)
- Lowes/HQ M8 Nut(s)
- Antiseize paste
- X-acto knife or a 7/16" drill bit and electric drill
Jack up the front of your car and support it with ramps and/or jackstands. Refer to the "how to jack up your car" article if you're not sure how to do so. If you want to live, do not work under your car without using ramps and/or jackstands!
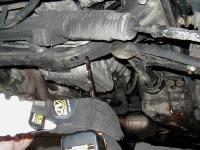
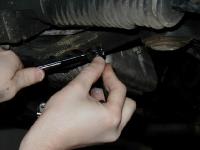
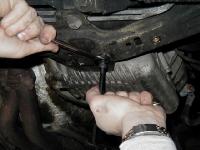
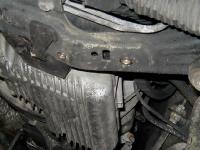
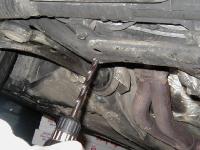
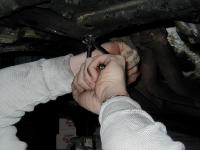
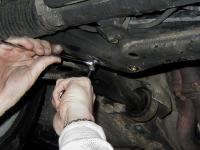
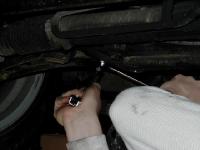
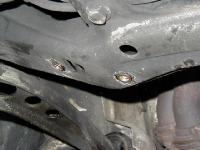
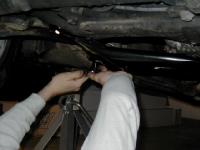
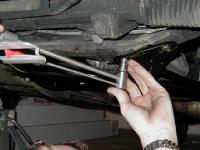
If you have a M3 built 10/94 or later then you can skip the nutsert install, you already have them installed from the factory. For everyone else the nutsert install is really the only tricky part. Thread a nut on to one of the allen bolts all the way to the head, drop on two washers with a little anti-seize between them, put a couple of drops of Lock-Tite Red on the threads at the end of the bolt and then thread on a nusert with the wide end facing the washers. Let the Lock-Tite harden for about a minute. Clean out the hole for the nutsert in the crossmember, you might have to drill the hole out with a 7/16" drill bit or you might just be able to scrape away the gunk out the holes with an x-acto knife. Try scraping first, if the nutserts don't fit, drill out the hole. Stick an allen wrench in the end of the allen bolt, put a couple drops of Lock-Tite Red on the outside of the nutsert and jamb the nutsert in to the hole in the crossmember. While holding the bolt/nutsert in the hole all the way and not letting it turn, use an open end wrench to turn the nut clockwise. It will require a LOT of effort at first while the nutsert begins to expand. When you've tightened the nut down as far as possible and fully collapsed the nutsert, back the nut off a little and then use the allen wrench to unscrew the bolt from the nutsert. The nutsert should now be firmly wedged in to the hole. Repeat on the other three holes.
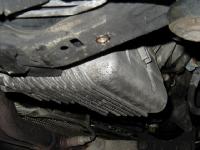
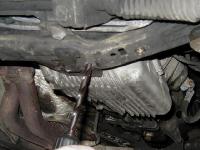
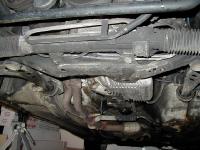
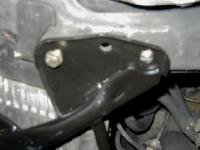
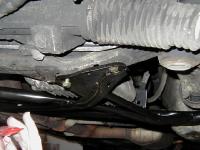
Since the x-brace replaces the original crossover brace, you will need to remove it. Use a 16mm socket (may vary in size) to remove the two M10 bolts attaching it to the subframe rails. Discard the crossover brace. Hold the x-brace up against the subframe rails and crossmember. Thread in the four M8 bolts in to the nutserts and reuse the M10 bolts in the subframe rails.
Take out one bolt at a time and put a drop of Lock-Tite Blue on the threads then reinstall and tighten down. Torque the M8 bolts to ~20lbs and the M10 bolts to ~50lbs. And now come the really difficult part.... oh wait... never mind you're done 8-)
Lower your car back down off the ramps/jackstands
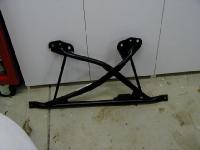
X-Brace |
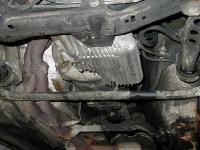
Cross Brace |
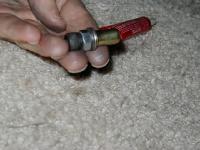
Nutsert "Tool" |
Drilling Hole #1 |
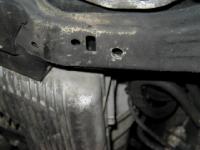
Cleared Hole |
Installing Nutsert #1 |
Installed Nutsert #1 |
Drilling Hole #2 |
Installing Nutsert #2 |
Installed Nutsert #1 |
Drilling Hole #3 |
Installing Nutsert #3 |
Installing Nutsert #4 |
Installing Nutsert #4 |
Installed Nutserts |
Installed Nutserts |
Installing M8 Bolts |
Installing M10 Bolts |
Lock-Tite |
Torque Bolts |
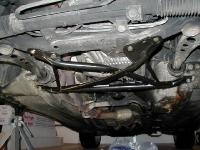
Installed |

|